A few years ago, I decided to try my hand at using SMD components for building circuits. I bought a cheap heat gun and some tweezers and set to work harvesting whatever parts I could melt off old PC circuit boards. Pretty soon, I realized that I needed a place to store all the little bits I had been liberating, as storing them scattered like grit across my workbench wouldn’t do.
I started brainstorming. I wanted something that could hold many different types of SMD parts without allowing them to mix. Initially I explored the possibility of building a tray with many small compartments. I experimented with scoring, folding, and gluing cardboard compartments from cereal boxes, but I found the cardboard to be thick and ugly, and it was very time-consuming to make even one compartment.
I usually operate under the “never throw anything away” principle, and as a result, I have a rather large collection of CD jewel cases from over the years. The Internet and USB flash memory has practically killed CD-ROMs, and what I will end up burning, using, and storing in the future will impact only a fraction of my collection.
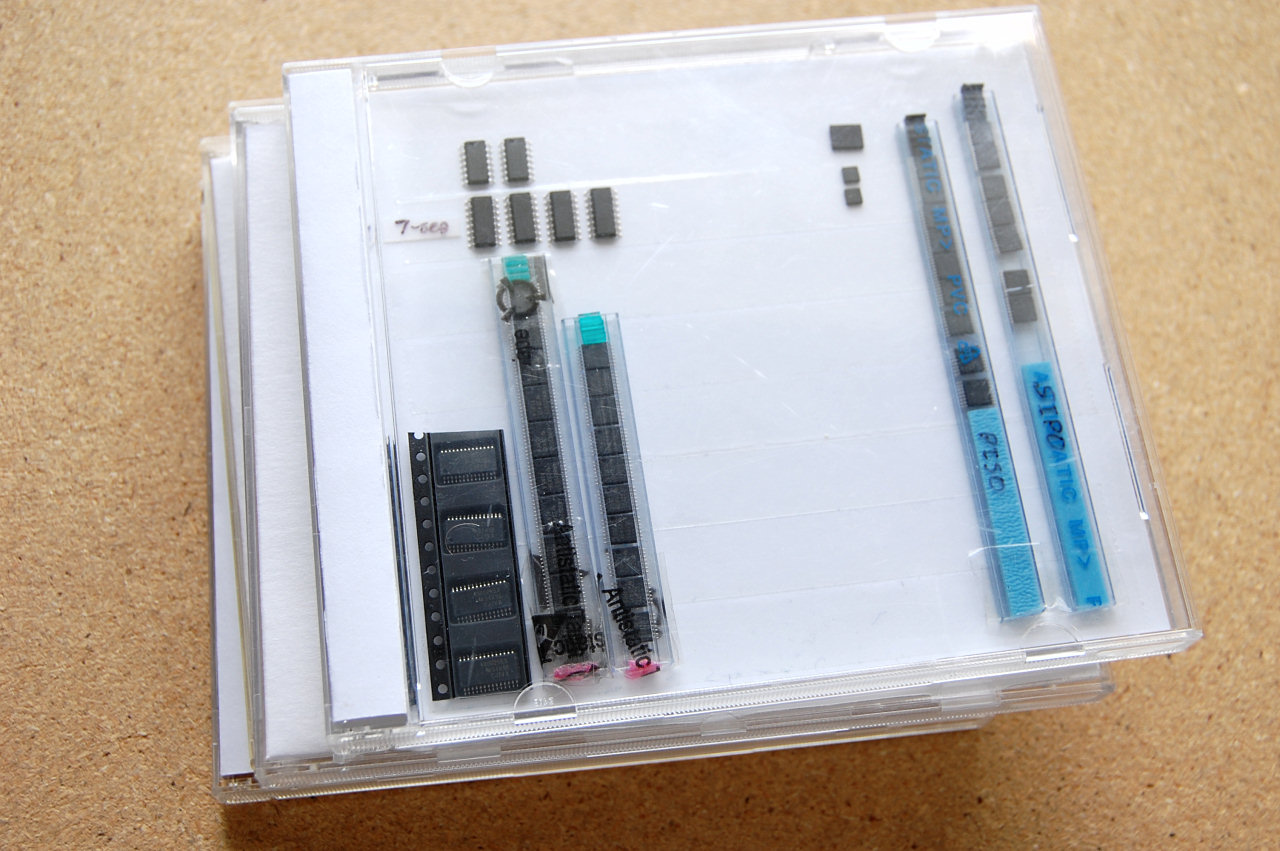
My focus turned to CD jewel cases. They were shiny and clear, and presented just the right thickness inside to store many types of SMD parts in an accessible fashion. I just needed some way to keep them from constantly mixing.
I experimented with using thin card stock and measuring, scoring, and folding a single sheet in a planned pattern in order to create a grid of little compartments, one for each type of part. That turned out to be too tedious. It was difficult to know how to calculate accurately how much paper was needed to provide dividers of exactly the right height to prevent leaks between compartments, but not too high to prevent the lid from closing properly. A few attempts failed miserably; on to other ideas.
I had previously made small leaded component cases out of a short section of drinking straw and a couple of staples, and I wondered if I could put the drinking straw to use once again. I tried cutting very short sections, about a quarter inch long, and tried gluing or taping them to card stock I had taped to the inside of the CD case. I could try using them as little round cups, and I envisioned hundreds of them, all arranged like a honeycomb. Unfortunately, they turned out to be too small to be very useful, and it was difficult to cut them to the right length consistently, not to mention very tedious.
I tried to hold down the pieces of straw using several methods. I tried to glue the pieces to the paper with craft glue, but I had to let it dry for hours. I tried using two small pieces of tape on either side of the piece, which splayed outward at the bottom and stuck to the paper. I also tried using double-sided tape to hold the pieces of straw on the paper.
It was while experimenting with the double-sided tape that I noticed that the components inside the little cups were (understandably) sticking to the tape I had laid down to hold the cup in place. I started laying down multiple strips of double-sided tape, and found that the components would stick enough to keep them from flying loose, but not too much that I couldn’t use tweezers to remove them. I ditched the straw cup idea and went with strips of tape instead.
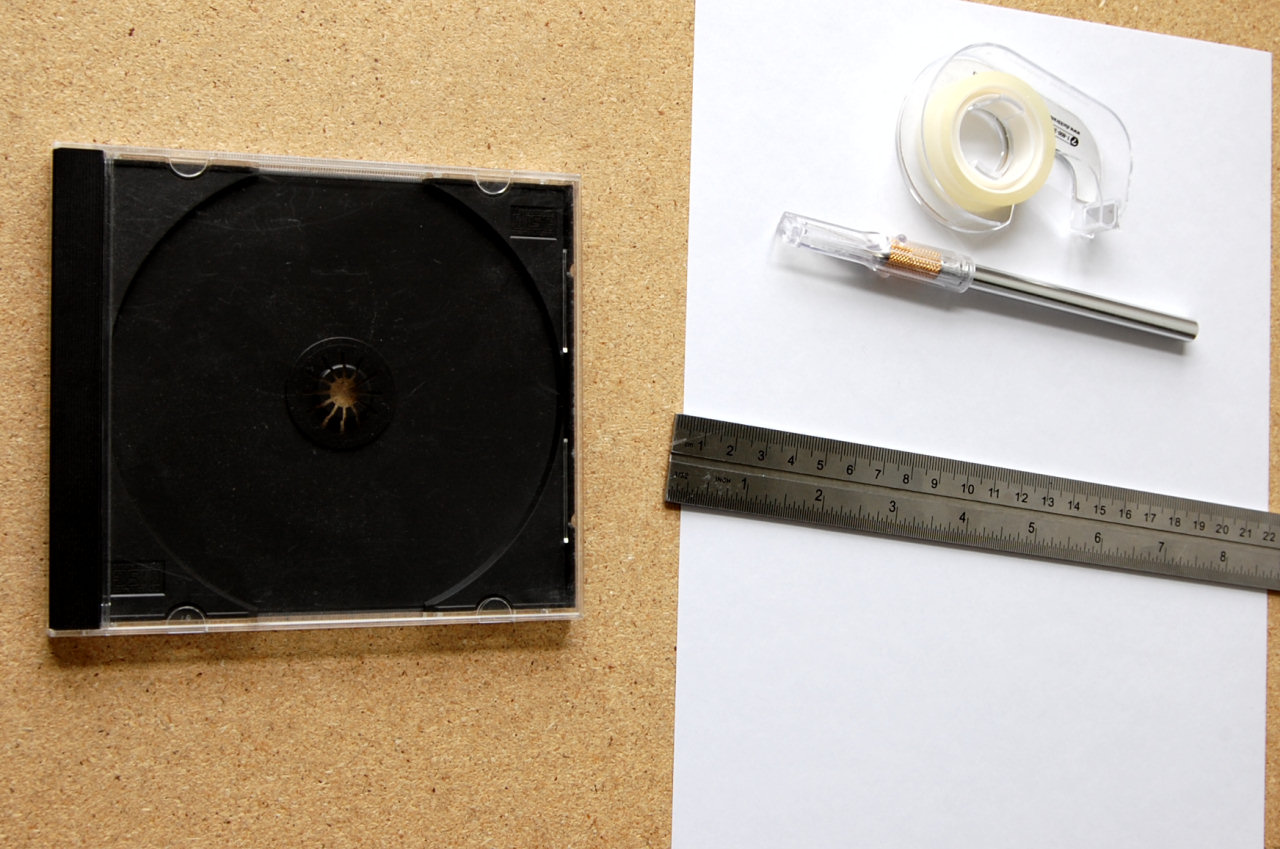
To make one, start with a full sheet of cardstock.
- Measure off 118 mm down both long sides, and cut off the resulting rectangle. Set aside the larger piece; the smaller piece is what you will use.
- On the smaller rectangle, make marks down the long side at 8.5 mm, 17.5 mm, 27 mm, and 154 mm. Make matching marks on the other side.
- Using a straight edge and a knife, score very lightly across the sheet, between the 8.5 mm marks and the 17.5 mm marks. Turn the sheet over and lightly score between the 27 mm marks.
- Cut completely through between the 154 mm marks, and discard the smaller piece.
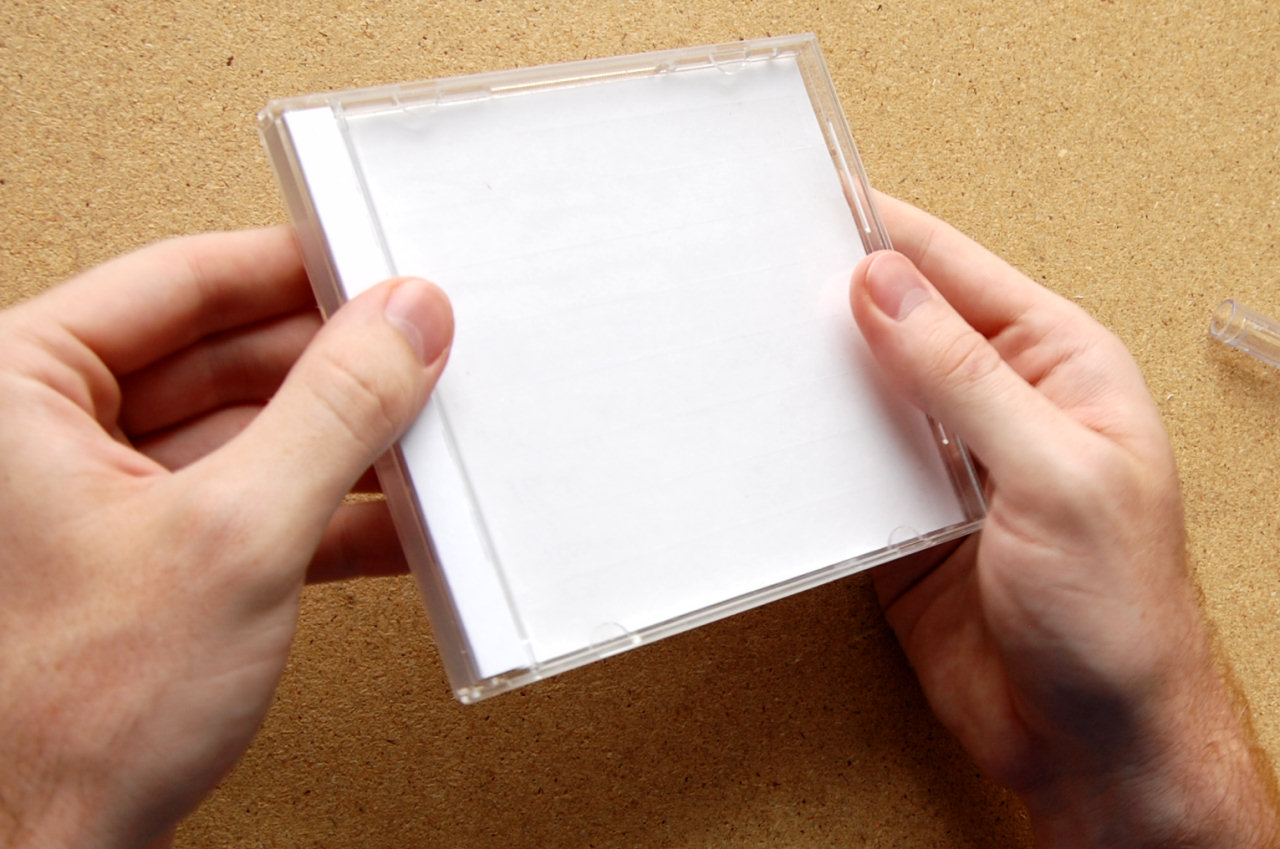
- At this point you should have a rectangular sheet of paper, 118 mm wide and 154 mm long, with a three scored lines close to one end. Gently fold the paper away from you for the lines scored on the top surface, and toward you for the line scored on the bottom surface.
- Remove the plastic CD holder insert from an empty CD jewel case.
- Test-fit the folded card into the bottom half of the CD case, with the folded part near the hinge of the case.
- Back to work. Apply strip after strip of double-sided tape to the flat portion of the card. Try not to overlap the strips, but also try to get them close together. Normally, 8 strips will fit comfortably, but 9 is probably possible if you align them perfectly.
- Once no more tape will fit on the card, apply two shorter strips of tape to the inside of the CD case, one close to the edge farthest from the hinge, and one about a thumb’s width away from the hinge edge. The extra margin accounts for the folded portion which folds away from the back closest to the hinge, out of reach of any tape that might be close to the hinge edge.
- Insert the card into the CD case, pressing on the tape farthest from the hinge, and finishing with the tape closer to the hinge. Fit the folded section along the hinge edge, and you’re done!
This kind of container can also be useful for other things, like organizing pin drill bits for a PCB drill, storing button batteries and coin cells, or various other small through-hole parts. What you use it for is up to you.